
Post-production in photography is defined as the complete editing and processing workflow applied to images after capture to enhance their visual quality and communicate the photographer's intended story. Every professional image you admire, from a polished wedding portrait to a magazine cover, passed through a deliberate post-processing phase before delivery. Skipping or rushing this stage produces inconsistent results that undermine even technically strong shots. At Larsonprophotography, post-production is treated as a craft equal in weight to the shoot itself, because the camera captures the moment but editing shapes how that moment is remembered.
What is post-production in photography and why does it matter?
Post-production in photography refers to every step taken after the shutter closes: culling, color correction, retouching, and final export. The industry term for this phase is "post-processing," and the two labels are used interchangeably by working professionals. What separates post-processing from simple photo editing is scope. Simple editing might mean adjusting brightness on a single image. Post-processing covers an entire shoot, from hundreds of raw files down to a curated, color-consistent final gallery.
The importance of post-production extends beyond aesthetics. Structured workflows can improve efficiency by up to 650% compared to unstructured editing. That figure reflects real gains in client turnaround times and project consistency. For wedding photographers especially, delivering a cohesive gallery of 400 to 800 images on time depends entirely on a repeatable post-production system.
Post-production also defines a photographer's visual identity. The color grade, skin tone treatment, and shadow detail in every image signal a recognizable style. Clients book photographers partly based on that style, so maintaining it across every gallery is a business requirement, not just a creative preference.

What are the key steps in a professional post-production workflow?
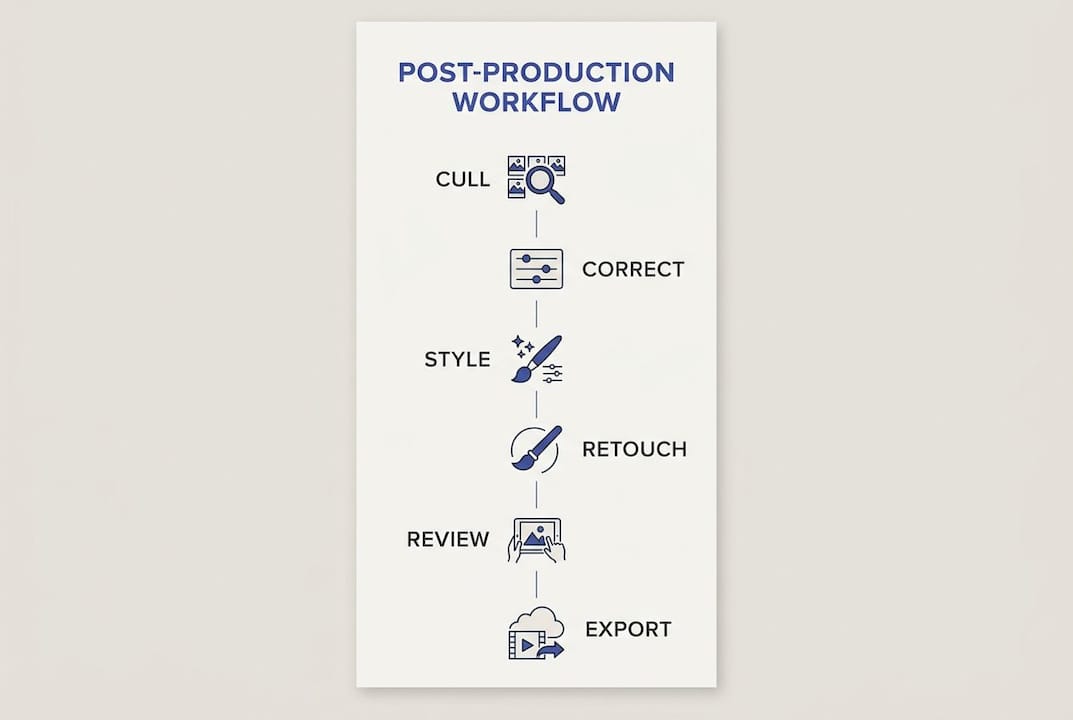
A standard professional workflow follows six steps: cull, correct, style, retouch, review, and export. Each step has a defined purpose, and skipping one creates problems downstream.
-
Cull. Select the strongest images from the raw shoot. Remove duplicates, out-of-focus frames, and unflattering expressions. Good culling reduces the editing workload by 50% or more before any adjustments begin. Tools that use AI-assisted culling can flag technical rejects automatically, leaving the photographer to make final creative calls.
-
Basic correction. Apply global adjustments to exposure, white balance, highlights, shadows, and contrast. These corrections establish a neutral, accurate baseline before any creative grading begins.
-
Build consistency. Sync the baseline corrections across similar images from the same lighting condition. This step is what separates professional delivery from amateur editing. A gallery where every outdoor ceremony shot shares the same white balance and exposure reads as intentional and polished.
-
Retouch. Address specific images that need detailed work: skin smoothing, object removal, or composite work. This is the most time-intensive step and should be reserved for hero images only.
-
Review. Proof the full gallery before export. Check for color inconsistencies, missed corrections, and any images that do not meet delivery standards.
-
Export. Generate final files in the correct format and resolution for each intended use.
Pro Tip: Start with cropping and straightening before any exposure or color work. Editing areas that will be cropped out wastes time, and fixing lens distortion early gives you an accurate read on composition and exposure from the start.
The photography editing process works best when it is repeatable. A consistent sequence means fewer decisions per image, which reduces fatigue and speeds up delivery without sacrificing quality.
Which software tools are used in photographic post-production?
Tool choice shapes how fast and how consistently a photographer can work through a large shoot. The right combination reduces friction at every step.
- Lightroom. The industry standard for batch editing, catalog management, and color grading. Its non-destructive workflow preserves raw files while storing all edits as metadata. Most professionals handle 80% or more of their post-production inside Lightroom.
- Capture One. Preferred by studio and commercial photographers for its superior color science and tethered shooting support. It handles skin tones with more nuance than Lightroom in many lighting conditions.
- Photoshop. Reserved for complex retouching tasks: frequency separation for skin, background replacement, and detailed compositing. Using Photoshop only for complex retouching keeps the overall workflow fast. Opening every image in Photoshop is the single fastest way to fall behind on a deadline.
- AI culling tools. Applications that analyze sharpness, exposure, and facial expressions to pre-sort images. They do not replace creative judgment, but they eliminate the most tedious part of culling.
- Presets and profiles. Saved adjustment packages that apply a consistent starting point across an entire shoot. A good preset handles 70% of the correction work instantly, leaving the photographer to fine-tune individual images.
Pro Tip: Apply a preset as a starting point, then adjust each image individually. A preset that works perfectly on every shot without any tweaking is a sign you are under-editing, not that you have found a perfect formula.
Photographers who work across both Lightroom and Capture One often use one for batch work and the other for select hero images. The key is keeping Photoshop out of the batch process entirely. That single discipline saves hours on a 600-image wedding gallery.
How do post-production techniques enhance image quality and consistency?
The goal of every post-production technique is to serve the image's story, not to demonstrate technical skill. The best edits feel natural and elevate the photographer's creative vision rather than alter the scene beyond recognition. That principle guides every decision from white balance to retouching.
Effective post-production techniques work at two levels: global and local.
- Global adjustments affect the entire frame: exposure, white balance, contrast, color grading, and lens corrections. These set the mood and technical baseline for the image.
- Local adjustments target specific areas: brightening a subject's face, darkening a blown-out sky, or adding contrast to a specific region. Separating global and local adjustments is critical to effective editing. Trying to fix a local problem with a global slider creates new problems elsewhere in the frame.
- Color grading defines the emotional tone. Warm shadows and lifted blacks read as romantic and soft. Cool, high-contrast grades feel editorial and modern. Matching the grade to the shoot's mood is a creative decision that no preset can make automatically.
- Retouching removes distractions: stray hairs, blemishes, unwanted objects in the background. The standard is to retouch what the subject would want removed, not to reshape anatomy or alter the scene's reality.
- Consistency across the gallery is the most underrated technique. A unified look across a shoot signals professionalism. Inconsistency, where one image is warm and the next is cool for no compositional reason, is the most common editing pitfall professionals identify.
Planning the intended final look before editing begins prevents erratic results. Photographers who define their target grade before opening the first image edit faster and produce more cohesive galleries than those who decide image by image.
What are the final output and delivery considerations in post-production?
Export settings are the last technical decision in the photography editing process, and getting them wrong wastes all the work that came before. The correct settings depend entirely on where the image will be used.
Standard web export settings use JPEG format, sRGB color space, 80–85% quality, and a long edge resized to 2,048 pixels. These settings balance visual quality with file size for online viewing.
| Use Case | Format | Color Space | Quality | Long Edge |
|---|---|---|---|---|
| Web / social media | JPEG | sRGB | 80–85% | 2,048 px |
| Client online gallery | JPEG | sRGB | 90% | 3,000 px |
| Print (lab order) | JPEG or TIFF | Adobe RGB | 100% | Full resolution |
| Archival backup | RAW + XMP | Native | Lossless | Full resolution |
Matching output to use case protects image quality at every stage. Delivering full-resolution files for a web gallery wastes bandwidth and slows load times. Delivering compressed web files for a print order produces soft, pixelated prints.
Archiving raw files alongside their edit metadata (XMP sidecar files or catalog backups) is non-negotiable for professional photographers. Raw files are the original negative. Losing them means losing the ability to re-export at any future specification.
A structured approach to client-photographer collaboration during the delivery phase, confirming file formats and resolution requirements before export, eliminates the most common delivery errors.
Key Takeaways
Post-production in photography is a structured, multi-step process that transforms raw captures into polished, consistent images ready for delivery across any medium.
| Point | Details |
|---|---|
| Post-production is a full workflow | It covers culling, correction, styling, retouching, review, and export, not just basic editing. |
| Structured workflows drive efficiency | Well-organized post-production processes produce measurable gains in turnaround time and client satisfaction. |
| Tool selection shapes speed | Use Lightroom or Capture One for batch work and reserve Photoshop for complex retouching only. |
| Consistency is the defining quality mark | A cohesive color grade across an entire gallery signals professional-level post-processing. |
| Export settings must match the use case | Web, print, and archival outputs each require different format, color space, and resolution settings. |
Why I think most photographers underestimate post-production planning
Most photographers treat post-production as something that happens after the shoot. I treat it as something that starts before the shoot. The single biggest factor in how fast and how well I edit a gallery is what I decided before I pressed the shutter.
A clear shoot plan reduces post-production complexity directly. When I know the lighting conditions, the intended mood, and the final delivery format before I arrive on location, I make better exposure decisions on the day. Those better decisions mean fewer problem images to fix in post. Fewer problem images mean faster editing and a more consistent gallery.
The other thing I have learned is that automation is a tool, not a replacement for judgment. AI culling saves me real time on large shoots. Presets give me a consistent starting point. But the creative decisions, the ones that make a gallery feel like it was shot by a specific photographer with a specific vision, those still require a human eye and a deliberate choice. Over-relying on automation produces galleries that look processed rather than edited.
My advice to any photographer building a post-production practice: define your target look before you open the first image. Write it down if you have to. Knowing where you are going before you start editing is the difference between a consistent gallery and an erratic one. Photographers who work with a structured photo session plan consistently deliver better post-production results than those who improvise both on location and at the desk.
— Todd
Professional post-production at Larsonprophotography
Larsonprophotography applies the same structured six-step workflow to every wedding and engagement shoot, from initial culling through final export. Every gallery delivered to clients reflects consistent color grading, careful retouching, and export settings matched to the intended use.

Couples planning a San Antonio wedding can review Larsonprophotography's client portfolio and delivery process to see the post-production quality firsthand. For those considering an engagement session, the engagement photography page details how post-production consistency is built into every package. Quality post-production is not an add-on at Larsonprophotography. It is part of every booking.
FAQ
What is post-production in photography?
Post-production in photography is the complete workflow of editing, retouching, and exporting images after capture. It transforms raw files into polished, delivery-ready photographs that reflect the photographer's creative vision.
How many steps are in a professional post-production workflow?
A standard professional workflow has six steps: cull, correct, style, retouch, review, and export. Each step serves a defined purpose and builds on the one before it.
What software do professional photographers use for post-production?
Most professionals use Lightroom or Capture One for batch editing and color grading, then reserve Photoshop for complex retouching tasks. This combination keeps large-volume workflows fast without sacrificing quality on hero images.
What are the correct export settings for web delivery?
Standard web export uses JPEG format, sRGB color space, 80–85% quality, and a long edge resized to 2,048 pixels. These settings balance visual quality with file size for online viewing.
Why does post-production consistency matter for wedding photography?
Consistency across a wedding gallery signals professional-level editing and matches the visual style clients saw in the portfolio when they booked. Inconsistent color grading is the most common editing pitfall and the fastest way to undermine an otherwise strong shoot.