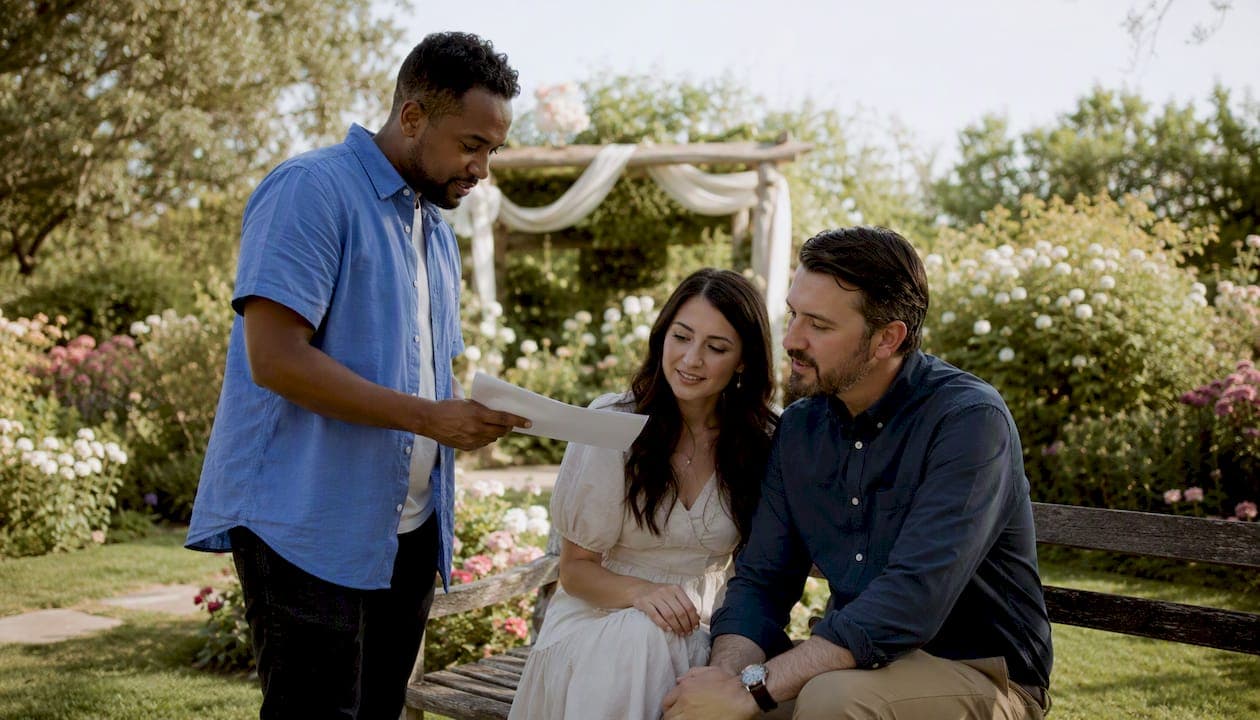
A clear client brief turns your photography idea into deliverable images by aligning goals, scope, and technical needs before anyone picks up a camera. Without one, photographers guess at your intent, and guessing costs money. The role of a client brief in photography is straightforward: it gives your photographer everything they need to plan the right shots, at the right time, with the right output.
Three things happen when you hand over a solid brief:
- Alignment on goals: Your photographer understands the purpose, mood, and must-have moments before the shoot day.
- Accurate logistics and budget: Knowing location, timeline, and deliverable counts lets the photographer price and plan without surprises.
- Predictable deliverables: Specifying file formats, usage rights, and retouching scope prevents disputes after the shoot.
At minimum, a brief should cover: objective, audience, deliverables (count and format), timeline, budget range, key stakeholders, location, and usage rights.
Table of Contents
- What a photography brief actually is (and what it isn't)
- Key components every client brief should include
- When to prepare the brief and how the process works
- What deliverables, technical specs, and usage rights you need to state
- How to write an effective brief, step by step
- Example briefs and templates for common shoot types
- What photographers notice in briefs: common mistakes to avoid
- Key takeaways and immediate next steps
- Key Takeaways
- Why the brief matters more than most clients realize
- Larsonprophotography makes the briefing process straightforward
- Useful sources, templates, and where to find sample briefs
What a photography brief actually is (and what it isn't)
A photography brief, sometimes called a creative brief or project brief, is a summary document that defines the scope, purpose, and constraints of a shoot. It covers the creative context (mood, style, reference images), the operational context (location, schedule, team), and the constraints (budget, deliverable formats, licensing). Think of it as the single page that answers every question a photographer might otherwise have to ask you twice.
It is not the same as a briefing. A briefing is the live conversation where you walk through the document together. The brief is the actual page; the briefing is the meeting where you confirm everyone read it the same way.
Two other documents often get confused with the brief:
| Document | Primary purpose | Flexibility | Typical author |
|---|---|---|---|
| Photography brief | Define goals, context, and constraints | High (creative direction can evolve) | Client, with photographer input |
| Shot list | Capture specific required images | Low (it's a checklist) | Client and photographer together |
| Contract / scope of work | Legal and financial terms | Very low (binding) | Photographer or agency |
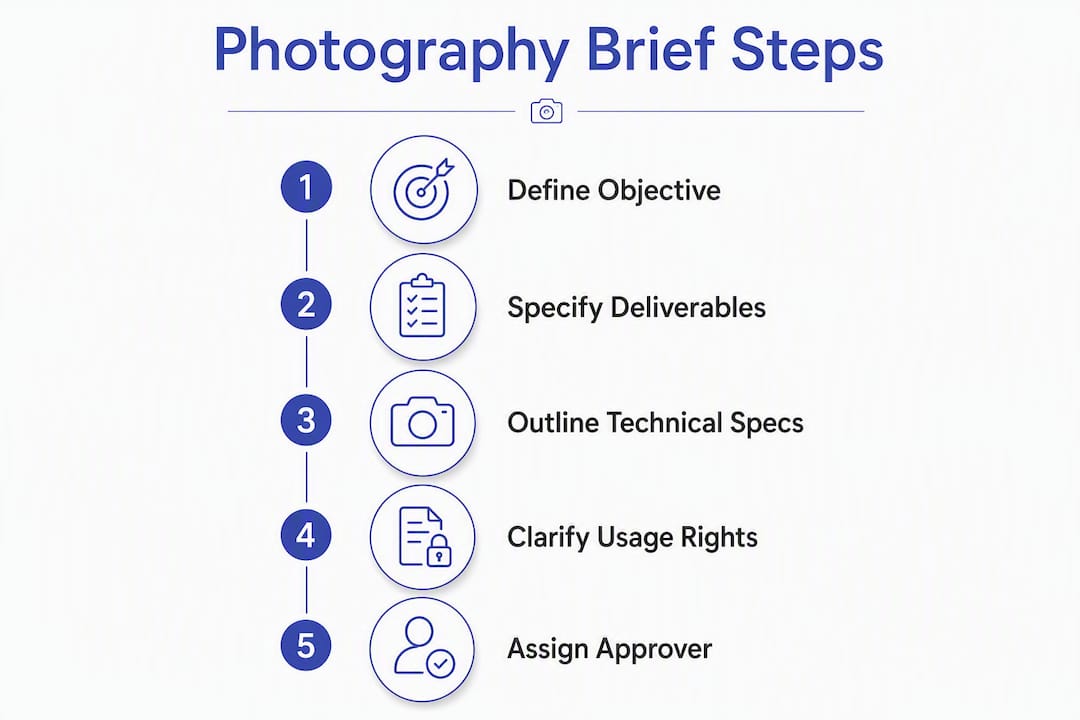
The brief informs the shot list; the contract locks the scope. Write the brief first, use it to build the shot list, then let both documents feed into the contract.
Key components every client brief should include
A professional photography brief should cover eight core dimensions. Here they are as a numbered checklist you can copy directly:
- Project objective: One or two sentences on what the photos are for (website hero, wedding album, product catalog, editorial feature).
- Target audience: Who will see these images and what reaction you want from them.
- Deliverables: Exact count of final images, file formats (JPEG, TIFF, PNG), and sizes (web-optimized vs. print-ready).
- Timeline: Shoot date, editing turnaround, and any hard publication or event deadlines.
- Budget range: A realistic range, not a single number. Photographers use this to scope retouching, assistants, and equipment.
- Key stakeholders: Everyone who will see and comment on the images, and, critically, who has final approval authority.
- Location and logistics: Venue address, access restrictions, parking, permits, and any on-site contacts.
- Technical constraints: Lighting conditions, brand color profiles, file-naming conventions, or platform-specific size requirements.
- Usage and licensing: Where the images will appear, for how long, and whether the photographer retains any rights.
Pro Tip: Name a single approver in your brief. The most commonly overlooked detail is the approval chain: when multiple stakeholders can request changes, you get contradictory feedback and unplanned revision rounds. One named person with final sign-off authority prevents that entirely.
Here is a short field-level template you can paste into an email or Google Doc:
Project name:
Objective (one sentence):
Audience:
Deliverables (count + format):
Shoot date:
Delivery deadline:
Budget range:
Approver (single name):
Other stakeholders:
Location + access notes:
Technical specs (color profile, file format, naming):
Usage rights (platforms, duration, exclusivity):
Reference images (links or attachments):
When to prepare the brief and how the process works
Draft the brief before you book, not after. Photographers use the brief to confirm they are the right fit for your project, price the job accurately, and plan equipment and assistants. Sharing it at the inquiry stage saves everyone time.
The typical briefing process runs in five stages:
- Draft: Client writes a first version using the checklist above.
- Share: Send the draft to the photographer before any formal booking or contract.
- Briefing meeting: A 30–60 minute call or in-person session where the photographer asks clarifying questions and flags anything technically unfeasible. This conversation is often more important than the written document because it is where creative goals meet technical reality.
- Versioned update: After the meeting, update the brief to reflect the photographer's suggestions and any agreed changes. Label it "v2" and send it back for written confirmation.
- Sign-off: Both parties confirm the versioned brief in writing before the shoot. This becomes the reference document if scope questions arise later.
For weddings specifically, a brief serves as a visual roadmap that lets the photographer plan lighting positions, ceremony timing, and portrait windows in advance. Arriving at a venue without that roadmap means rushed decisions during moments you cannot repeat.
What to expect the photographer to ask during the briefing meeting:
- Are there any moments that are absolute must-haves (first kiss, cake cutting, specific family groupings)?
- Who is the single approver for final image selection?
- Are there any access restrictions at the venue (no flash during ceremony, restricted areas)?
- What is the turnaround expectation and how will images be delivered?
- Do you have reference images or a mood board?
For wedding clients coordinating multiple vendors, clear communication workflows between planner, photographer, and venue make the briefing process significantly smoother.
What deliverables, technical specs, and usage rights you need to state
Vague deliverables are the single fastest path to a reshoot or an invoice dispute. Specifying deliverables, retouching scope, and file formats before the shoot prevents extra charges that neither side anticipated.
| Deliverable type | What to specify | Where it matters |
|---|---|---|
| Final edited JPEGs | Count, resolution (DPI), color profile (sRGB vs. Adobe RGB) | Web, print, social |
| Web-optimized files | Max file size (KB), pixel dimensions | Website, email campaigns |
| Print-ready files | DPI, color profile, bleed if applicable | Magazines, large-format prints |
| RAW files | Whether included, storage format | Archiving, future re-editing |
| Video / highlight film | Duration, format (MP4), resolution (web-optimized, print-ready) | Social, website, event replay |
On usage rights, three common arrangements exist:
- Limited license: Images may be used on specified platforms for a defined period. The photographer retains copyright.
- Exclusive license: Client has sole use rights for a defined period; the photographer cannot license the same images to others.
- Full buyout: Client owns all rights; the photographer surrenders copyright entirely. This costs significantly more.
State which arrangement you need in the brief. Photographers price these differently, and discovering a mismatch after delivery creates friction that a single sentence in the brief would have prevented.
On retouching: specify whether you want basic color correction only, skin retouching, object removal, or composite work. Each level adds time and cost. Also confirm the color profile (sRGB for web, Adobe RGB for print) and your preferred file-naming convention if you have one.
How to write an effective brief, step by step
Writing a brief does not require a design background or agency experience. It requires specificity.

Start with the objective. One sentence that answers: what are these images for, and what should they make the viewer do or feel? "Product images for our e-commerce site that make the packaging look premium and drive purchase" is a usable objective. "Nice photos of our products" is not.
Separate must-haves from nice-to-haves. This distinction saves budget and prevents disappointment. A simple two-column list works:
| Must-have | Nice-to-have |
|---|---|
| Ceremony first kiss | Drone aerial of venue exterior |
| All immediate family groupings | Candid cocktail hour details |
| Detail shots of rings and florals | Sunset portraits on the grounds |
Use reference images, but curate them. Showing reference images reduces ambiguity and speeds creative alignment between client and photographer. Collect 6–12 images that represent the mood, lighting style, and composition you want. Avoid dumping 50 images with no annotation; conflicting references confuse more than they help. Add a one-line note to each: "Love the warm tones here" or "This framing for the reception tables."
For practical guidance on communicating your vision through mood boards, the process is simpler than most clients expect.
Be specific about people and logistics. Name the key subjects, note any mobility considerations, and flag anything that affects timing (a ceremony that must end by a specific time, a venue that loses natural light early).
Keep it short. A brief that runs longer than two pages usually means the objective is unclear. If you cannot summarize the shoot in a paragraph, keep drafting until you can.
Example briefs and templates for common shoot types
Three mini-templates you can adapt directly:
1. Wedding (event-day)
Objective: Full-day coverage of our wedding at [Venue], San Antonio.
Audience: Us, immediate family, wedding album and social sharing.
Deliverables: 500–600 edited JPEGs, sRGB, web and print resolution.
Timeline: Ceremony 4:00 PM, reception ends 10:00 PM. Gallery delivery within 6 weeks.
Budget: $3,000–$4,500.
Approver: [Bride's name].
Must-haves: Ceremony (processional, vows, first kiss), all family groupings, first dance, cake cutting.
Nice-to-haves: Drone exterior, detail flat-lays, candid guest moments.
Usage: Personal use, social media, printed album. No commercial use.
References: [Link to Pinterest board].
2. Product (e-commerce packshot)
Objective: Clean packshots of 12 SKUs for our Shopify product pages.
Audience: Online shoppers; images must read clearly on mobile screens.
Deliverables: 3 angles per SKU (36 images total), JPEG, 2000px on longest side, white background, sRGB.
Timeline: Shoot date [X], delivery within 5 business days.
Budget: $800–$1,200.
Approver: [Marketing manager name].
Must-haves: Front, back, and 45-degree angle for each SKU.
Nice-to-haves: One lifestyle shot per product.
Usage: Website and paid social ads, 2-year license, non-exclusive.
3. Portrait / editorial headshot
Objective: Updated headshots for our 8-person leadership team for the company website and LinkedIn.
Audience: Business clients and prospective hires.
Deliverables: 2 final selects per person (16 images), JPEG, 1200px wide, sRGB.
Timeline: Half-day shoot at our office, delivery within 10 business days.
Budget: $1,500–$2,000.
Approver: [HR director name].
Must-haves: Consistent background and lighting across all subjects.
Nice-to-haves: One casual/candid option per person.
Usage: Website, LinkedIn, press releases. Perpetual, non-exclusive license.
References: [Link to 3 example headshots].
To adapt these for a smaller budget, reduce deliverable counts and drop nice-to-haves. For larger projects, add a second approver review stage and expand the timeline by at least one week. For wedding-specific checklists, the essential wedding photography checklist covers additional shot categories worth adding to your brief.
What photographers notice in briefs: common mistakes to avoid
Many marketers believe they write good briefs, but fewer agencies share that view. The gap is almost always in operational details, not creative direction. Photographers notice the same pattern.
The most costly omissions:
- No named approver. When five people can comment on final images, you get five different opinions and no clear path to sign-off.
- Vague objective. "Beautiful photos" tells a photographer nothing about composition, mood, or intended use.
- Missing usage rights. Discovering after delivery that the client needs commercial licensing when only personal use was priced creates real disputes.
- Conflicting reference images. A mood board that mixes dark moody film tones with bright airy editorial styles forces the photographer to guess which direction you actually want.
- No hard deadlines. "As soon as possible" is not a deadline. A publication date or event date is.
A brief that omits the approval chain is the single most common cause of unplanned revision rounds. Identifying one named approver before the shoot, and confirming that person's authority in writing, eliminates the back-and-forth that inflates both cost and timeline.
Real-world friction looks like this: a client shares 40 reference images with no annotation, the photographer shoots toward the darker, moodier half of the board, and the approver (who preferred the bright airy images) requests a partial reshoot. That reshoot costs time and money that a single annotated mood board would have prevented.
A practical checklist photographers wish every client would use before sending a brief:
- Have I named a single approver?
- Have I specified deliverable counts and file formats?
- Have I stated usage rights clearly?
- Have I annotated my reference images?
- Have I included a hard delivery deadline?
- Have I listed any access restrictions at the venue or location?
Key takeaways and immediate next steps
A well-written brief is not a formality. It is the document that determines whether your shoot delivers what you imagined or what the photographer guessed you wanted.
Four things to do right now:
- Draft your brief using the nine-component checklist above. Even a rough first draft is more useful than a verbal conversation.
- Gather and annotate references. Pull 6–12 images and add a one-line note to each explaining what you like about it.
- Book a briefing call. Share the draft before the call so the photographer arrives prepared to ask specific questions, not general ones.
- Version and confirm. After the call, update the brief, label it v2, and get written confirmation from both sides before the shoot date.
On licensing: state your usage rights explicitly in the brief, even if you think it is obvious. "Personal use only" and "website and paid ads" are priced differently, and the brief is the right place to lock that in.
Treat the brief as a living document. After the briefing call, update it to include the photographer's suggestions, version it, and circulate it for written confirmation. That versioned document is your protection against scope creep and your photographer's protection against undefined expectations.
Key Takeaways
A photography brief prevents costly reshoots and disputes by aligning goals, deliverables, and usage rights before the shoot begins.
| Point | Details |
|---|---|
| Name a single approver | Missing approval authority is the top cause of contradictory feedback and unplanned revision rounds. |
| Specify deliverables precisely | State image count, file format, resolution, and color profile to avoid post-shoot disputes. |
| State usage rights upfront | Limited, exclusive, and full-buyout licenses are priced differently; clarify before booking. |
| Version the brief after the briefing call | Label the updated document and get written confirmation to lock scope and prevent reshoots. |
| Larsonprophotography briefing process | Larsonprophotography runs a structured briefing call, versioned brief sign-off, and full shoot planning for wedding and engagement clients in San Antonio. |
Why the brief matters more than most clients realize
Most clients treat the brief as a formality they fill out to satisfy the photographer. That framing gets it backwards.
The brief is primarily a tool for you. It forces you to articulate what you actually want before you are standing in a venue at 4:00 PM with one hour of golden light left. Photographers are skilled at reading a room and making creative decisions under pressure, but they cannot read your mind. A strong brief does not constrain their creativity; it gives them guardrails and visual references so they can apply professional judgment instead of guessing at undefined goals.
The detail clients most consistently skip is the approval chain. Not because they forget it exists, but because they assume it is obvious. It rarely is. A couple may both assume they are the approver. A marketing team may have three people who believe they have veto power. Naming one person in writing takes thirty seconds and eliminates the most common source of extra revision rounds.
One more thing worth saying plainly: budget transparency in the brief protects you. Photographers scope retouching, assistants, and equipment to the budget you share. A vague or understated budget produces a proposal that cuts corners you did not know were being cut. Give a realistic range, and the proposal you get back will actually reflect what you need.
Larsonprophotography makes the briefing process straightforward
Wedding and engagement photography involves more moving parts than most clients anticipate: ceremony timing, lighting windows, family groupings, venue access, and a delivery timeline that has to work around your life. Larsonprophotography handles the briefing process as a structured part of every booking, not an afterthought.

When you work with Larsonprophotography, you get a dedicated briefing session before your shoot where the team walks through your objectives, reviews your reference images, and builds a versioned brief you both sign off on. That document covers deliverables, retouching scope, file formats, and usage rights so there are no surprises at delivery. For couples in San Antonio and nearby cities, this means arriving at your wedding day with a photographer who already knows your must-have shots, your approval chain, and your timeline.
Ready to start? Book a planning consult or explore engagement session options to see how the briefing process works from the first conversation.
Useful sources, templates, and where to find sample briefs
| Resource | What it offers |
|---|---|
| Milanote photoshoot brief template | Visual, drag-and-drop brief template covering background, goals, deliverables, and reference imagery. |
| VSCO creative photography briefs guide | Explains how mood boards and reference images speed creative alignment. |
| Clariva: how to write a project brief | Covers the eight-component framework used in this article. |
| Aviy.ai client brief template | Practical template with versioning guidance and briefing meeting tips. |
| IPA/AAAA briefing best practices | Industry-standard guidance on brief quality and approval chain structure. |
| Twine photography project brief example | Worked example brief with notes on approval chain and scope management. |
| Larsonprophotography: what is a photography brief | Couples-focused guide to brief basics for wedding and event shoots. |
| Larsonprophotography: client-photographer collaboration guide | Explains the briefing conversation and collaborative workflow for wedding clients. |
Keep any brief you download versioned from the start. Label your first draft "v1," update it after the briefing call, and circulate "v2" for written confirmation. For wedding-specific fields and shot categories, the internal resources above include checklists you can fold directly into your brief template.