You've probably seen it: portraits that look so natural, so effortlessly beautiful, that you forget someone was telling the couple exactly where to stand. That kind of photo doesn't happen by accident. It's the result of deliberate craft, smart lighting choices, and a photographer who knows how to bring out genuine connection rather than forced smiles. Whether you're planning an engagement session around the San Antonio River Walk or preparing for your wedding day portraits, these insider techniques will help you walk into every shoot feeling confident, relaxed, and ready to create images you'll treasure for the rest of your lives.
Table of Contents
- Build chemistry with foundational posing techniques
- Direct natural movement for authentic moments
- Master natural light for romantic portraits
- Use simple tools to control and enhance light
- Why focusing on connection outshines technical perfection
- Ready for portraits you'll love for a lifetime?
- Frequently asked questions
Key Takeaways
| Point | Details |
|---|---|
| Start with simple posing | Five basic foot positions create nearly every flattering couple pose. |
| Movement creates authenticity | Interactive prompts make portraits easier and show true connection. |
| Golden hour light flatters | The best light for romantic portraits is 90 minutes before sunset. |
| Use small tools for better lighting | A reflector or bounced flash can mean the difference between flat and glowing portraits. |
| Emotion means more than perfection | The real magic happens when couples relax and focus on each other. |
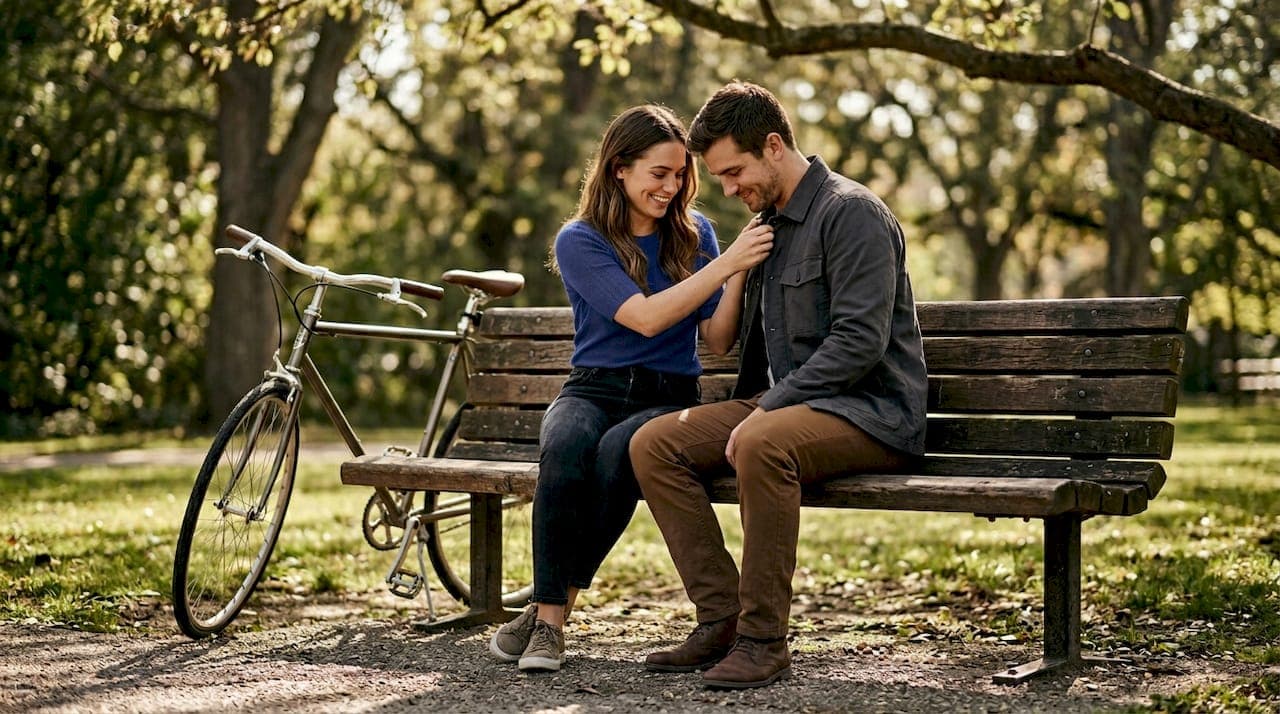
Build chemistry with foundational posing techniques
Most couples show up to their first session with the same question: "What do we do with our hands?" It's a fair concern. Standing in front of a camera feels unnatural, and most people freeze. The secret that professional photographers use is a posing framework, not a rigid script.
According to solid engagement photography tips, 97% of poses derive from just five basic foot positions, often called V-up, open, closed, stacked, and split stance. Once you understand these positions, a near-endless variety of portrait compositions opens up. You're not memorizing a hundred different poses. You're learning five adjustments and letting the rest follow naturally.
Here's how a well-structured session typically progresses:
- Distance poses first. Start with a comfortable two to three feet of space between partners. This removes pressure and lets both people settle into the shoot.
- Side-by-side connection. Move into shoulder-to-shoulder positions, encouraging light hand contact.
- Face-to-face intimacy. Progress to close, front-facing poses where eye contact and forehead touches feel organic rather than forced.
- Spontaneous moments. By the final third of the session, couples are relaxed enough that genuine laughter and connection appear on their own.
It helps to understand basic wedding photography terms before your session so you know what your photographer means when they say "foreground framing" or "leading lines." That shared vocabulary speeds everything up.
| Foot position | Best for | Resulting mood |
|---|---|---|
| V-up | Romantic face-to-face shots | Intimate, tender |
| Open stance | Relaxed side profiles | Casual, natural |
| Closed stance | Tight embrace | Warm, secure |
| Stacked | Walking or movement shots | Dynamic, playful |
| Split stance | Environmental portraits | Editorial, relaxed |
Building comfort with posing early also sets the tone for genuine engagement photos that truly reflect who you are as a couple rather than who you think you're supposed to look like in front of a camera.
Pro Tip: Before your session, practice one simple move at home. Stand face-to-face with your partner, place one hand on their chest, and look slightly away from the camera. Take a photo on your phone. You'll immediately see how small adjustments in body angle create a dramatically different look in portraits.
Knowing the essentials of posing brings us to how movement can make portraits come alive.
Direct natural movement for authentic moments
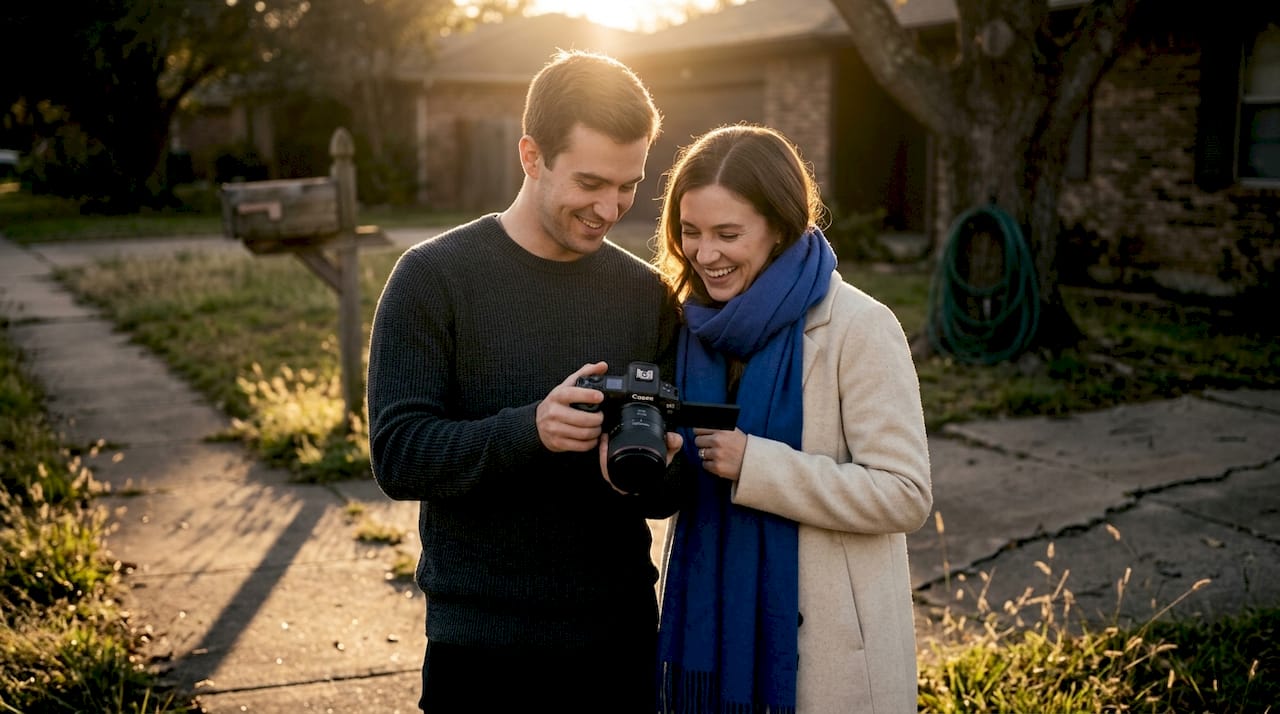
Static posing has its place, but the most emotionally resonant portraits almost always happen between the poses. When couples are walking, spinning, or whispering something into each other's ears, the camera catches expressions that no amount of coached posing can replicate.
The best approach to couple photography involves directing movement rather than frozen positions, using prompts like walking toward the camera, spinning slowly, or whispering a genuine secret. The photographer keeps shooting through the awkward transitions, because that's exactly where the real emotion surfaces.
Here's a step-by-step framework for using movement prompts during your session:
- The walk-toward. Start about 30 feet away from the camera and walk toward it together, talking naturally. This removes self-consciousness almost instantly.
- The spin and catch. One partner spins while the other catches them. The moment of laughter that follows is nearly always a portfolio-worthy shot.
- The whisper. One partner leans in and whispers something funny or sweet. The reaction on the listener's face is pure gold.
- The forehead touch. Stand close, eyes closed, foreheads together. This one is simple and produces quietly beautiful results every time.
- The walk-away. Walk away from the camera hand-in-hand without looking back. This creates stunning silhouette opportunities at golden hour.
"The best couple portraits we've ever made came from prompts, not poses. When couples are genuinely laughing or moving, the camera just tells the truth."
The key insight here is that your photographer is actively looking for what happens around the planned shot. Checking out the difference between engagement vs. wedding shoots shows how movement plays a different role in each context, but in both cases, it remains one of the most powerful tools for creating portraits full of life.
Pro Tip: Don't be afraid to suggest prompts yourself. If you and your partner have an inside joke or a specific way you greet each other, tell your photographer. Custom prompts tied to your real relationship produce photos that feel unmistakably yours.
Having set the stage with movement, the right lighting can elevate these moments dramatically.
Master natural light for romantic portraits
Light is the single most powerful variable in portrait photography. The same location at 2 p.m. and at 6:30 p.m. might as well be two different places entirely. Understanding how light works helps you schedule smarter sessions and communicate better with your photographer.
The golden hour, roughly 1.5 to 2 hours before sunset, delivers the kind of soft, warm, directional light that flatters virtually every skin tone and creates that signature romantic glow. It's not a myth. The lower angle of the sun during golden hour means longer shadows, reduced contrast, and a warmth in the color spectrum that no filter can fully recreate in post-processing.
| Time of day | Light quality | Best use |
|---|---|---|
| 6 to 9 a.m. | Cool, soft, diffused | Fresh morning looks |
| 10 a.m. to 3 p.m. | Harsh, overhead, high contrast | Avoid or use open shade |
| 3 to 5 p.m. | Warm but still direct | Transitional, workable |
| 90 min. before sunset | Soft, golden, directional | Ideal for most portraits |
| Sunset to blue hour | Deep, cool, dramatic | Moody editorial shots |
When golden hour isn't an option, the best photographers rely on open shade. Trees, building overhangs, and covered walkways create soft, even light without harsh shadows. Backlighting is another powerful technique, where the sun sits behind the couple and a reflector bounces light back onto their faces to balance the exposure.
Popular portrait lighting patterns like Loop lighting (where the shadow of the nose falls slightly downward and to the side) work on most face shapes and create a three-dimensional quality that flatters nearly everyone. Short lighting, where the shadow side of the face faces the camera, is particularly slimming for oval and round face shapes.
You can also keep an eye on current wedding trends in 2026 to see how different lighting styles are showing up in modern couples' galleries, which can help you articulate the look you're going for before your session.
Lighting quick facts:
- The golden hour lasts roughly 45 to 90 minutes depending on season and location
- Open shade reduces squinting and provides even illumination
- Backlight with fill creates depth and a luminous, editorial quality
- Overcast skies function as a giant natural softbox, excellent for skin tones
Once you've nailed timing and lighting, adding simple tools can further enhance photo quality.
Use simple tools to control and enhance light
You don't need a full studio to take control of light outdoors. A few simple, portable tools can make an enormous difference in the quality of your portraits, and knowing what your photographer might use helps you understand the process better.
A 5-in-1 reflector is the workhorse of outdoor portrait photography. According to engagement photography tips, a 5-in-1 reflector gives photographers the ability to use a silver panel for high-contrast drama, a white panel for soft fill light, and a diffusion panel to break up harsh direct sunlight. One piece of gear, three very different results.
Here's what each reflector surface actually does for your portraits:
- Silver side: Adds a punchy, high-contrast glow. Works beautifully for editorial or fashion-inspired portraits.
- White side: Produces gentle, flattering fill light that softens shadows without looking artificial.
- Gold side: Warms up the skin tone and mimics the golden hour effect even when the sun isn't cooperating.
- Black side: Absorbs light to deepen shadows and add drama, used more often for artistic or moody portraits.
- Diffusion panel: Placed between the sun and the subject, it turns harsh direct light into a soft, studio-quality source.
For couples who want a bit of added magic during their portrait sessions, asking your photographer about using a natural vs. flash lighting blend can open creative possibilities. A small off-camera flash bounced off a reflector or a white surface adds three-dimensional depth to outdoor portraits, especially during the flat midday hours when the sun sits directly overhead.
Pro Tip: When scheduling your session, ask your photographer what tools they typically bring for outdoor shoots. A photographer who mentions reflectors, diffusers, or supplemental flash has likely thought carefully about light quality, not just composition.
Understanding and communicating these elements leads to a uniquely personalized photo experience.
Why focusing on connection outshines technical perfection
Here's a perspective that most photography guides won't tell you directly: the most technically flawless portrait you've ever seen is rarely the one that makes you cry.
After photographing hundreds of couples across San Antonio, one pattern stands out clearly. The images couples frame and display above their mantels are almost never the most perfectly lit shots. They're the ones where you can feel something. A quiet laugh shared before the ceremony. The way one partner instinctively tucks a strand of hair behind the other's ear. The split second of pure joy right after the first look.
Technical excellence creates a foundation. Good light, solid posing, and the right gear prevent mistakes. But they don't manufacture emotion. Emotion comes from psychological safety, genuine prompting, and a photographer who knows when to stop giving instructions and just let a moment breathe. That's the real skill that separates forgettable portraits from ones that carry meaning for decades.
Chasing perfection often works against you. Couples who are anxious about looking perfect tend to look stiff, guarded, and disconnected. Couples who trust the process, laugh at the awkward moments, and stay present with each other produce images that radiate something no editing software can add in post.
If you're still working out the visual direction you want for your portraits, spending time choosing your wedding photo style before booking will help you find a photographer whose approach genuinely matches what you value. Because the right photographer isn't just someone with excellent gear and technical skills. They're someone who makes you feel comfortable enough to forget the camera is there, and that's when the real magic happens.
Ready for portraits you'll love for a lifetime?
At Larson Pro Photography, we've built every session around the principles in this guide: smart posing frameworks, movement-based prompting, intentional lighting, and above all, an obsessive focus on your connection as a couple.
Whether you're planning a relaxed engagement photo session at a San Antonio park or preparing for wedding portrait expertise on your big day, our approach ensures you'll walk away with images that feel unmistakably real. Take a look at our client galleries to see exactly how these techniques translate into finished portraits, and then reach out to start the conversation about your session. We'd love to tell your story.
Frequently asked questions
When is the best time of day for engagement portraits?
Golden hour, about 1.5 to 2 hours before sunset, delivers soft and flattering light that works beautifully for romantic couple portraits.
How can we look natural instead of stiff in our photos?
Focusing on gentle movement and candid prompts, like walking together or sharing a genuine laugh, encourages natural expressions instead of forced poses.
What simple tools can improve portrait lighting outdoors?
A 5-in-1 reflector is the most versatile option, offering the ability to add glow or soften shadows with a single portable tool.
Are traditional poses or candid shots better for wedding portraits?
A mix works best, but candid moments through movement consistently produce the most emotionally genuine results that couples cherish long after the wedding day.
Recommended
- Engagement photos: capture genuine love before your wedding
- Understand wedding photography terms for better photos
- Engagement vs. wedding shoots: what couples need to know
- Wedding trends and insights for 2026 - Larson Pro Photography
- How to Pose Camera Shy Couples Naturally - Creative Media Production LLC